* wip on ra upgrade

* Finish upgrade

* fix package.json

* pr fixes

* more pr fixes

* update readme
8 KiB
Synapse Admin UI 
This project is built using react-admin.
Fork differences
With Awesome-Technologies/synapse-admin as the upstream, this fork is intended to be a more feature-rich version of the original project. The main goal is to provide a more user-friendly interface for managing Synapse homeservers.
Available via CDN
On admin.etke.cc you can find the latest version of this fork.
Changes
The following changes are already implemented:
- Prevent admins from deleting themselves
- Fix user's default tab not being shown
- Add identifier when authorizing with password
- Add ability to toggle whether to show locked users
- Fix user's display name in header on user's page
- Fix footer overlapping content
- Switch from nginx to SWS for serving the app, reducing the size of the Docker image
- Fix redirect URL after user creation
- Display actual Synapse errors
- Fix base_url being undefined on unsuccessful login
- Put the version into manifest.json (CI only)
- Federation page improvements (using theme colors)
- Add UI option to block deleted rooms from being rejoined
- Fix required fields check on Bulk registration CSV upload
- Fix requests with invalid MXIDs on Bulk registration
- Expose user avatar URL field in the UI
- Upgrade react-admin to v5
the list will be updated as new changes are added
Development
just run-dev to start the development stack (depending on your system speed, you may want to re-run this command if
user creation fails)
After that open http://localhost:5173 in your browser, login using the following credentials:
- Login: admin
- Password: admin
- Homeserver URL: http://localhost:8008
Usage
Supported Synapse
It needs at least Synapse v1.93.0 for all functions to work as expected!
You get your server version with the request /_synapse/admin/v1/server_version.
See also Synapse version API.
After entering the URL on the login page of synapse-admin the server version appears below the input field.
Prerequisites
You need access to the following endpoints:
/_matrix/_synapse/admin
See also Synapse administration endpoints
Use without install
You can use the current version of Synapse Admin without own installation direct via GitHub Pages.
Note:
If you want to use the deployment, you have to make sure that the admin endpoints (/_synapse/admin) are accessible for your browser.
Remember: You have no need to expose these endpoints to the internet but to your network.
If you want your own deployment, follow the Step-By-Step Install Guide below.
Step-By-Step install
You have three options:
- Download the tarball and serve with any webserver
- Download the source code from github and run using nodejs
- Run the Docker container
Steps for 1)
- make sure you have a webserver installed that can serve static files (any webserver like nginx or apache will do)
- configure a vhost for synapse admin on your webserver
- download the .tar.gz from the latest release: https://github.com/Awesome-Technologies/synapse-admin/releases/latest
- unpack the .tar.gz
- move or symlink the
synapse-admin-x.x.xinto your vhosts root dir - open the url of the vhost in your browser
Steps for 2)
- make sure you have installed the following: git, yarn, nodejs
- download the source code:
git clone https://github.com/Awesome-Technologies/synapse-admin.git - change into downloaded directory:
cd synapse-admin - download dependencies:
yarn install - start web server:
yarn start
Steps for 3)
-
run the Docker container from the public docker registry:
docker run -p 8080:80 awesometechnologies/synapse-adminor use the docker-compose.yml:docker-compose up -dnote: if you're building on an architecture other than amd64 (for example a raspberry pi), make sure to define a maximum ram for node. otherwise the build will fail.
services: synapse-admin: container_name: synapse-admin hostname: synapse-admin build: context: https://github.com/Awesome-Technologies/synapse-admin.git args: - BUILDKIT_CONTEXT_KEEP_GIT_DIR=1 # - NODE_OPTIONS="--max_old_space_size=1024" # - BASE_PATH="/synapse-admin" ports: - "8080:80" restart: unless-stopped -
browse to http://localhost:8080
Restricting available homeserver
You can restrict the homeserver(s), so that the user can no longer define it himself.
Edit config.json to restrict either to a single homeserver:
{
  "restrictBaseUrl": "https://your-matrixs-erver.example.com"
}
or to a list of homeservers:
{
  "restrictBaseUrl": ["https://your-first-matrix-server.example.com", "https://your-second-matrix-server.example.com"]
}
The config.json can be injected into a Docker container using a bind mount.
services:
  synapse-admin:
    ...
    volumes:
      ./config.json:/app/config.json:ro
    ...
Serving Synapse-Admin on a different path
The path prefix where synapse-admin is served can only be changed during the build step.
If you downloaded the source code, use yarn build --base=/my-prefix to set a path prefix.
If you want to build your own Docker container, use the BASE_PATH argument.
We do not support directly changing the path where Synapse-Admin is served in the pre-built Docker container. Instead please use a reverse proxy if you need to move Synapse-Admin to a different base path. If you want to serve multiple applications with different paths on the same domain, you need a reverse proxy anyway.
Example for Traefik:
docker-compose.yml
services:
  traefik:
    image: traefik:mimolette
    restart: unless-stopped
    ports:
      - 80:80
      - 443:443
    volumes:
      - /var/run/docker.sock:/var/run/docker.sock:ro

  synapse-admin:
    image: awesometechnologies/synapse-admin:latest
    restart: unless-stopped
    labels:
      - "traefik.enable=true"
      - "traefik.http.routers.synapse-admin.rule=Host(`example.com`)&&PathPrefix(`/admin`)"
      - "traefik.http.routers.synapse-admin.middlewares=admin,admin_path"
      - "traefik.http.middlewares.admin.redirectregex.regex=^(.*)/admin/?"
      - "traefik.http.middlewares.admin.redirectregex.replacement=$${1}/admin/"
      - "traefik.http.middlewares.admin_path.stripprefix.prefixes=/admin"
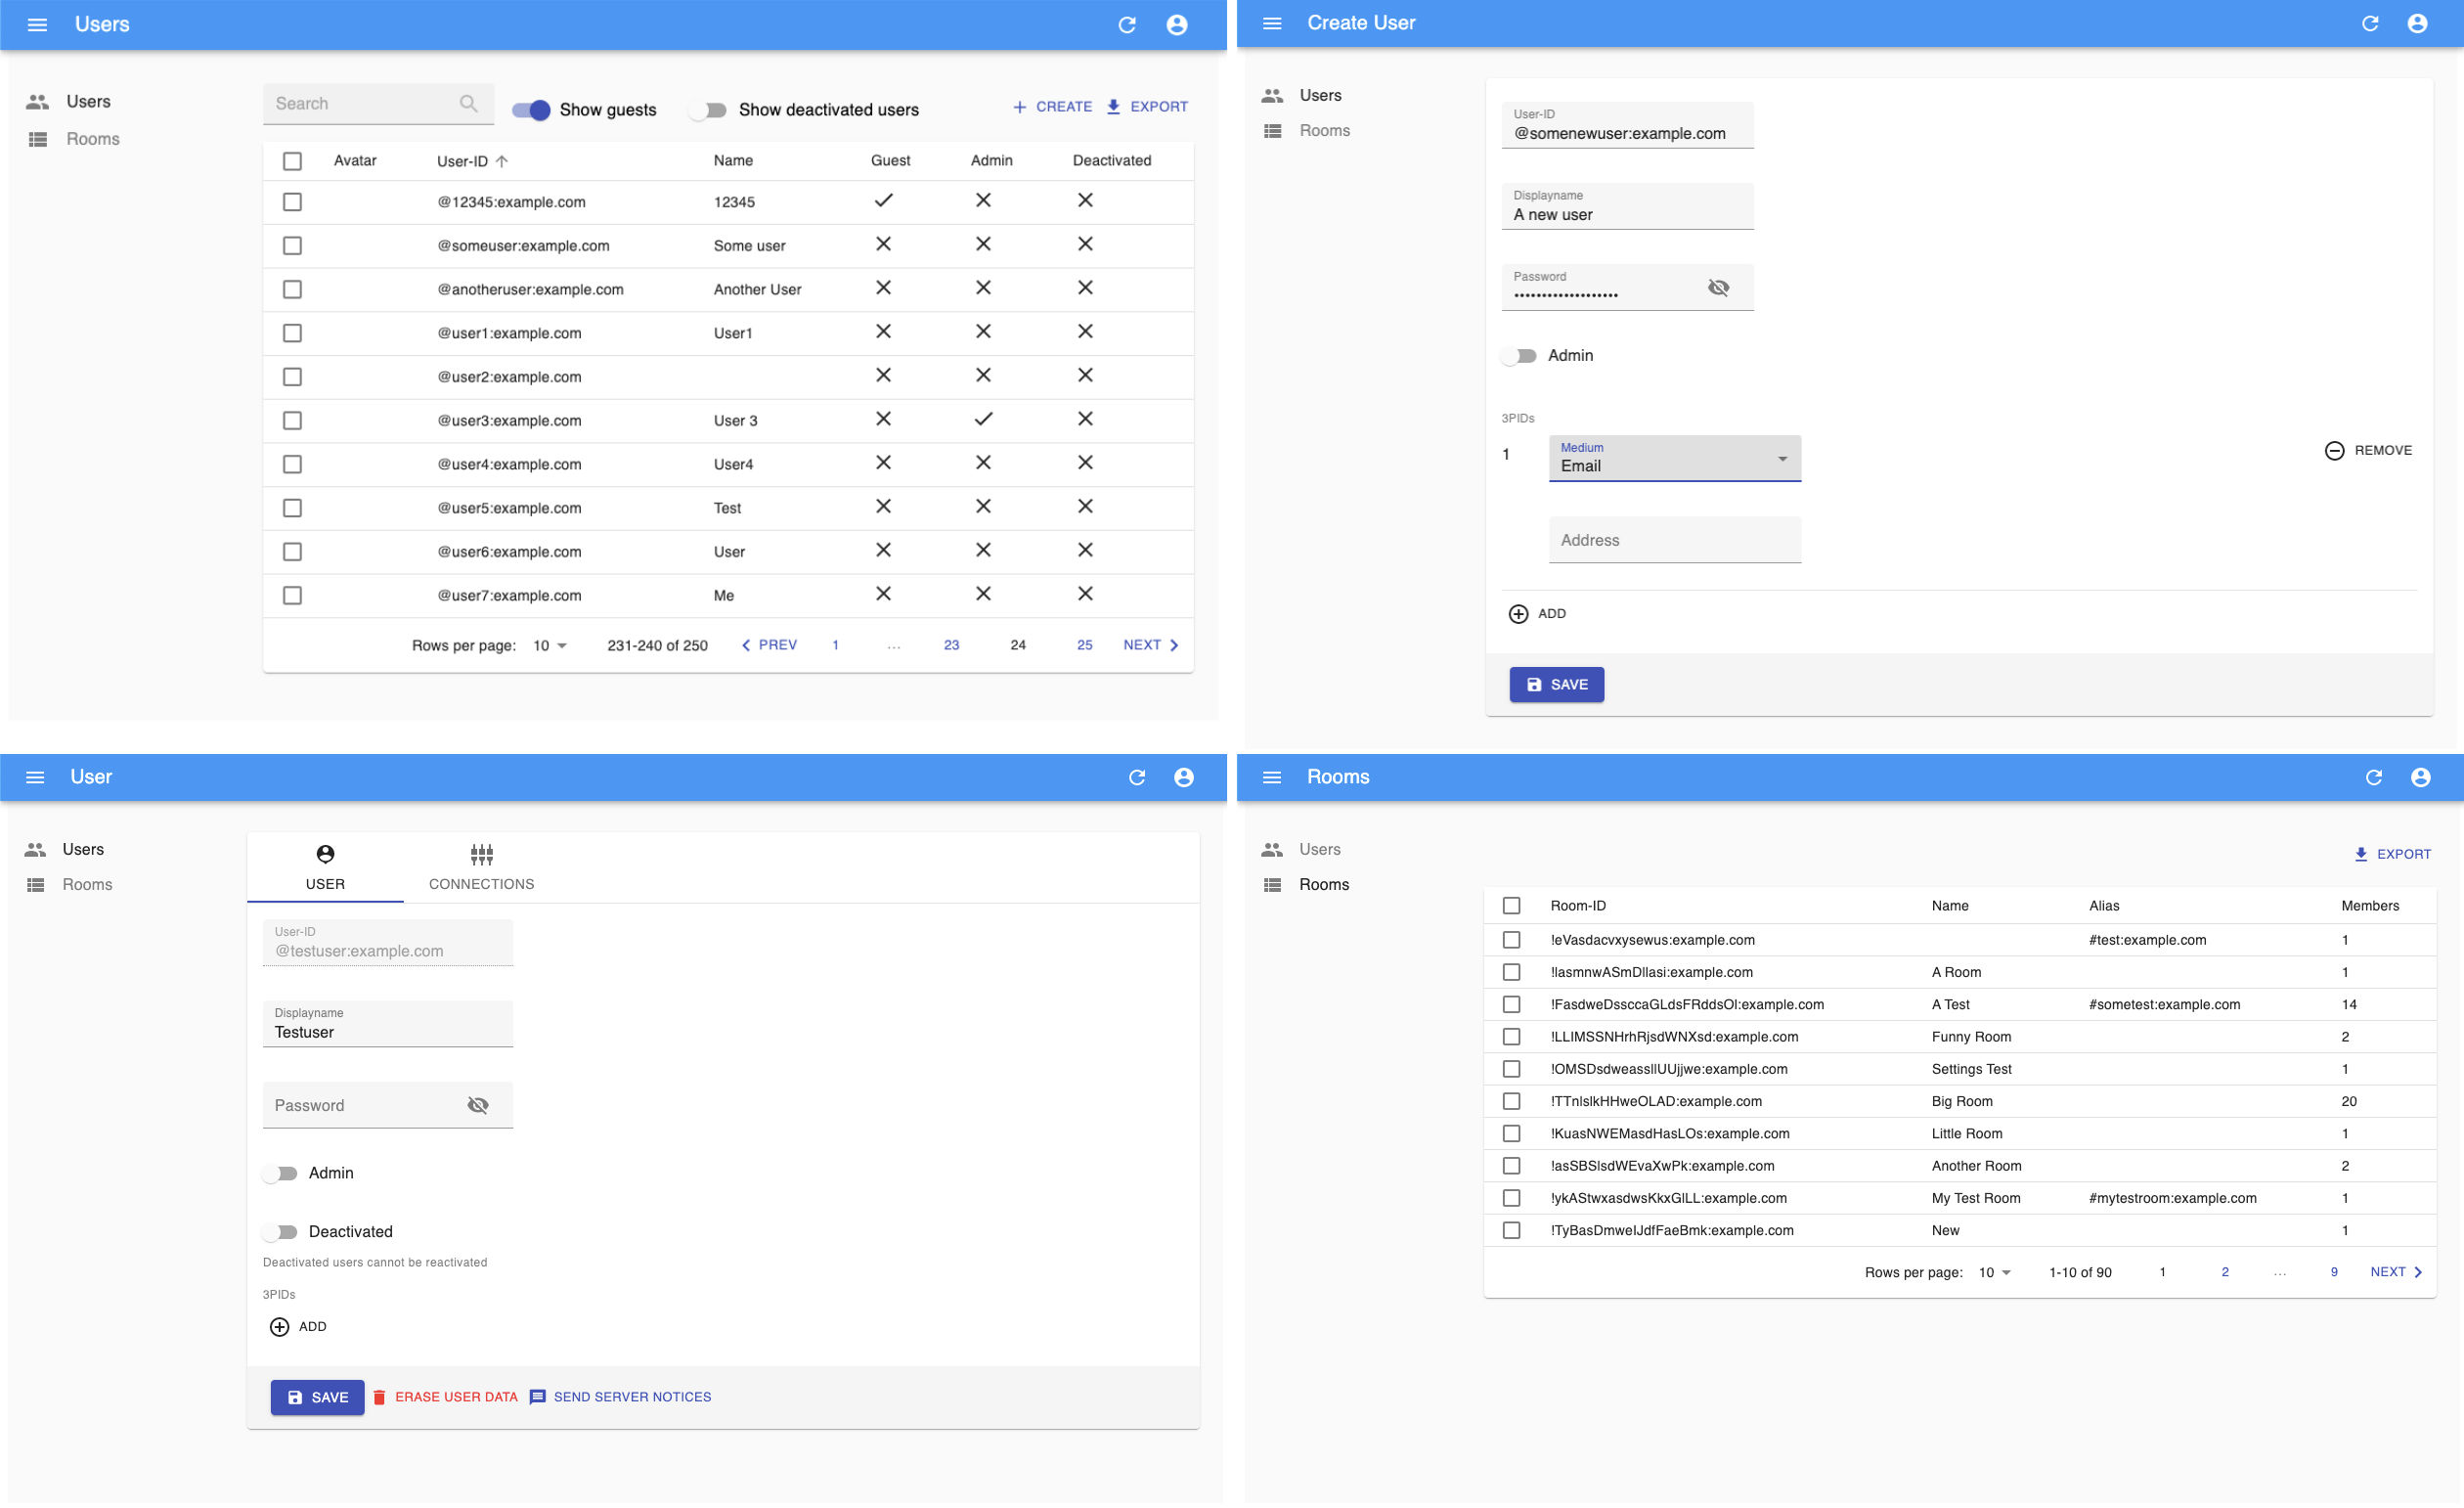
Screenshots
Development
- See https://yarnpkg.com/getting-started/editor-sdks how to setup your IDE
- Use
yarn lintto run all style and linter checks - Use
yarn testto run all unit tests - Use
yarn fixto fix the coding style
