5.1 KiB
Installing the Desktop Synchronization Client
You can download the latest version of the ownCloud Desktop Synchronization Client from the ownCloud Website. There are clients for Linux, Mac OS X, and Microsoft Windows.
Installation on Mac OS X and Windows is the same as for any software
application: download the program and then double-click it to launch the
installation, and then follow the installation wizard. After it is
installed and configured the sync client will automatically keep itself
updated; see autoupdate
for more information.
Linux users must follow the instructions on the download page to add the appropriate repository for their Linux distribution, install the signing key, and then use their package managers to install the desktop sync client. Linux users will also update their sync clients via package manager, and the client will display a notification when an update is available.
Linux users must also have a password manager enabled, such as GNOME Keyring or KWallet, so that the sync client can login automatically.
Improvements and New Features
The 2.0 release of the ownCloud desktop sync client has many new features and improvements.
- Multi-account support
- Many UI improvements
- Accessibility improvements (high contrast schemes)
- Automatic Bandwidth Throttling
- Don't show redundant directory entries in activity log
- Remove deleted accounts properly from toolbar
- File manager integration: Show hidden files as ignored
- Show wizard when last account was deleted
- Do not sync down new big folders from server without user's consent
- Integrate Selective Sync into the default UI
- More reliable reconnect after timeout
- Use SI units for the file sizes
- Improve progress reporting during sync
- Sharing: Do not allow sharing the root folder
- Sharing: Show thumbnail
- Client Updater: Check for updates periodically, not only once per run
- Quota: Only refresh from server when UI is shown
- SSL Button: Show more information
- System proxy: Ask user for credentials if needed
- Several fixes and performance improvements in the sync engine
- OS X: Show file name in UI if file has invalid UTF-8 in file name
- OS X: Support native finder integration for 10.10 Yosemite
- Network: Try to use SSL session tickets/identifiers
- Windows: Support paths >255 characters
- Windows, OS X: Allow to not sync hidden files
- Windows: Remove misleading option to remove sync data
- Windows: Do not provoke Active Directory account locking if password changes
- Windows: Fix installer when installing unprivileged
Note
When you upgrade from 1.8, restart Windows to ensure that all new features are visible.
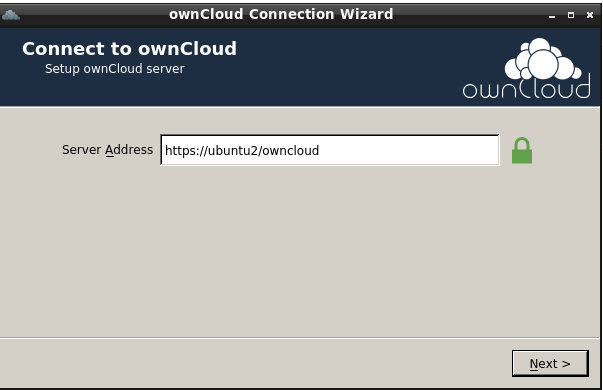
Installation Wizard
The installation wizard takes you step-by-step through configuration options and account setup. First you need to enter the URL of your ownCloud server.
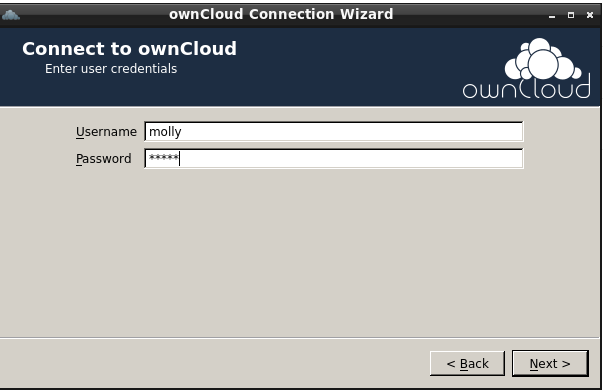
Enter your ownCloud login on the next screen.
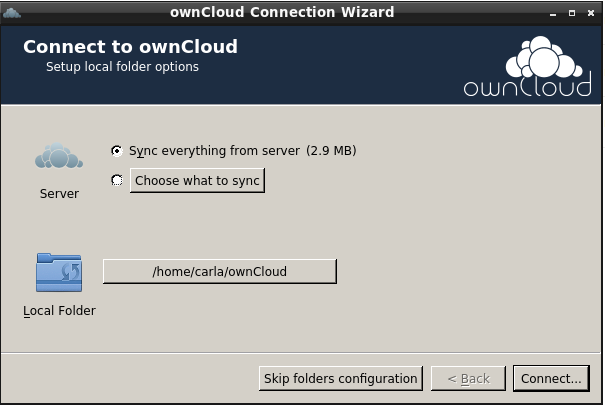
On the Local Folder Option screen you may sync all of your files on
the ownCloud server, or select individual folders. The default local
sync folder is ownCloud, in your home directory. You may
change this as well.
them in.
When you have completed selecting your sync folders, click the Connect button at the bottom right. The client will attempt to connect to your ownCloud server, and when it is successful you'll see two buttons: one to connect to your ownCloud Web GUI, and one to open your local folder. It will also start synchronizing your files.
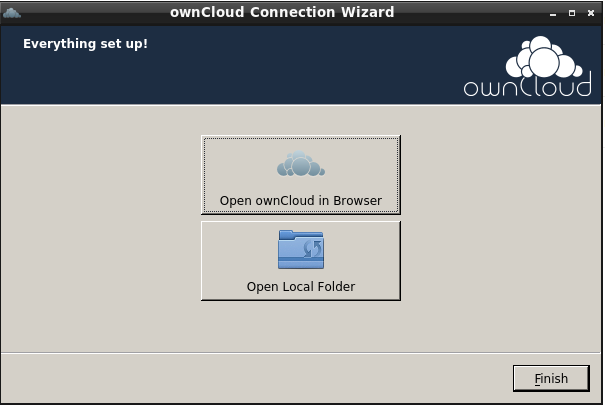
Web GUI, and one to open your local ownCloud folder
Click the Finish button, and you're all done.
When you are in your local ownCloud folder, you can right-click any
file or folder, and then left-click "Share with ownCloud" to create a
share link. Note that Windows may also have a Share With option. This is
not the ownCloud Share option. Linux users must install the
owncloud-client-nautilus package to enable file sharing
from the Nautilus file manager. The ownCloud share dialog looks like the
following example on Ubuntu Linux:
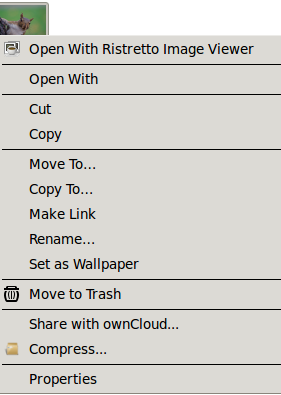
right-click file menu in your file manager
You may change your sync options at any time by opening your ownCloud client and selecting which folders to sync, or to remove from synchronization. you saw in the installation wizard. If you un-check any folders that you have already synchronized, they will be deleted from your local system.
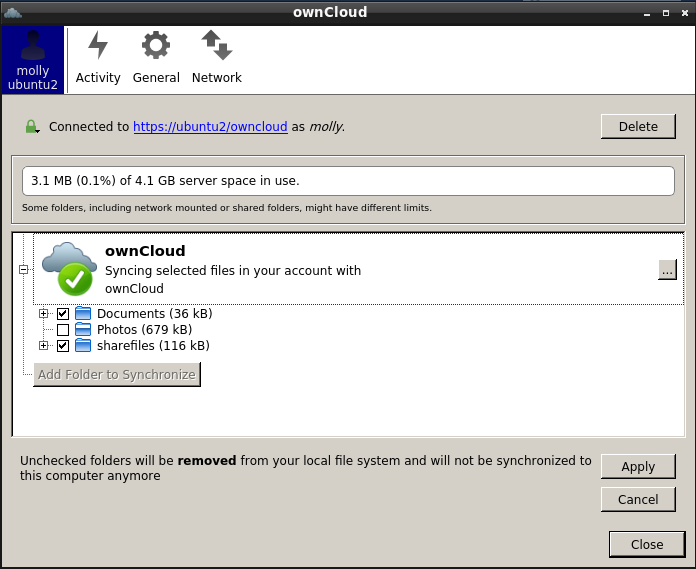
syncing