5.2 KiB
Using the ownCloud Android App
Accessing your files on your ownCloud server via the Web interface is easy and convenient, as you can use any Web browser on any operating system without installing special client software. However, the ownCloud Android app offers some advantages over the Web interface:
- A simplified interface that fits nicely on a tablet or smartphone
- Automatic synchronization of your files
- Instant uploads of photos or videos recorded on your Android device
- Easily add files from your device to ownCloud
- Two-factor authentication
Getting the ownCloud Android App
One way to get your ownCloud Android app is to log into your ownCloud server from your Android device using a Web browser such as Chrome, Firefox, or Dolphin. The first time you log in to a new ownCloud account you'll see a screen with a download link to the ownCloud app in the Google Play store.

You will also find these links on your Personal page in the ownCloud Web interface.
Find source code and more information from the ownCloud download page.
Connecting to Your ownCloud Server
The first time you run your ownCloud Android app it opens to a configuration screen. Enter your server URL, login name, password, and click the Connect button. (Click the eyeball to the right of your password to expose your password.)

For best security your ownCloud server should be SSL-enabled, so that
you can connect via https. The ownCloud app will test your
connection as soon as you enter it and tell you if you entered it
correctly. If your server has a self-signed SSL certificate you'll get a
warning that it is not to be trusted. Click the OK button to accept the
certificate and complete your account setup.

Managing Files
Now you should see the Files page of your ownCloud account.

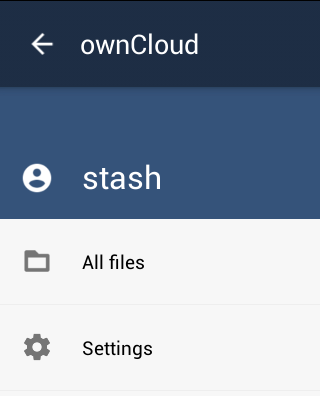
The ownCloud menu at the top left shows the name of the logged-in user, has a shortcut to your files, and contains the Settings button.

Click the overflow button at the top right (that's the one with three
vertical dots, and that is really what it is called) to open a user
menu. Refresh account syncs your files, and
Sort gives you the option to sort your files by date, or
alphabetically.

The little file folder icon to the left of the overflow button opens a dialog to create a new folder. The arrow button opens a file upload dialog, and you can either upload content from other Android apps such as Google Drive, the Gallery, your music player, or from your Android filesystem.

All files (that you have permission to access) on your ownCloud server are displayed in your Android app, but are not downloaded until you click on them to download them. Downloaded files are marked with a green arrow.

Download and preview a file with a short press on the filename. Then a short press on the overflow button opens a menu with options for managing your file.

read on the Internet."
When you are on your mail Files page, a long press on any folder displays a list of options: Share Link, Download, Rename, Move, Copy, and Remove.

When you enter a folder, a long press on any file or folder has these additional options: Open With, Refresh File, Send, Favorite, and Details. The Download option appears on files that have not been downloaded to your Android device.
Settings
Use the Settings screen to control your ownCloud app functions.

In the Accounts section you can set up and manage multiple accounts.
The Security section sets up strong two-factor authentication by allowing you to add a PIN (personal identification number) to access your account.
The Instant Uploads section creates a directory, /InstantUpload, and any
photos or videos created with your Android device's camera are instantly
uploaded to this directory. You also have the option to choose any other
existing directory, or to create a new one. Another nice option is
Upload Pictures/Video via WiFi Only, to conserve your mobile data
usage.
The bottom section of the Settings screen has links to help and the app's version number.